SharePoint 2010: Branding Step by Step IV
Setting Up a SharePoint Environment for Branding
The minimum requirements for installing SharePoint 2010 are
The process is kicked off with the Products Preparation Tool, to install all of Required programs that are required to make SharePoint Installation run.
Prerequisite's main functions
Click Install SharePoint Server from launch the Microsoft SharePoint Server 2010 splash screen.
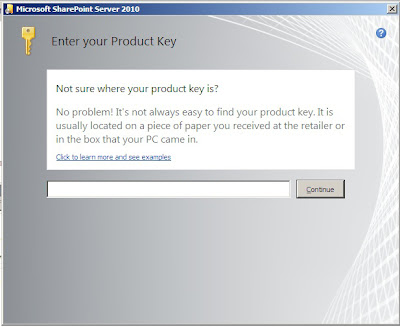
Next you will be move to prompts for Product Key. You must have the product key for your version of SharePoint Server 2010 existing
After that Read your License terms and click I accept and continue.
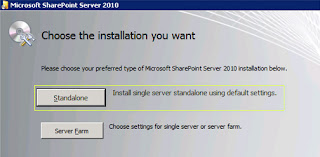
Next you will be Splash screen prompts for install SharePoint Server will appear Click Server Standalone, will install SQL Server Express 2010 with SharePoint Server installation package.
further details about SharePoint Setup - Farm installation you can go to below link:
http://sharepoint-admin-2010.blogspot.com/2011/01/installing-and-configuring-sharepoint.html
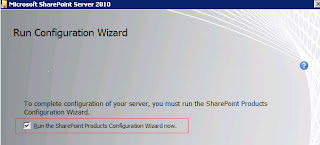
The Standalone installation will take few minutes, Next you will see the Run Configuration Wizard screen appear enabled the check box and click close, this will start the configuration wizard automatically.
On the Welcome to SharePoint Products and Technologies page, click Next.

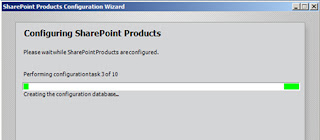
The wizard will now configure SharePoint 2010 - Standalone, will take few minutes. At the Configuration Successful prompt, click Finish.
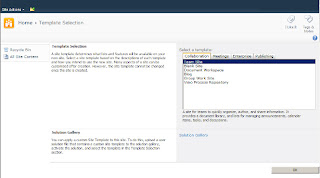
The configuration wizard creates an empty site collection and opens the page where you select its site template for your first SharePoint 2010 site collection. Select the collaboration - team site and click OK.
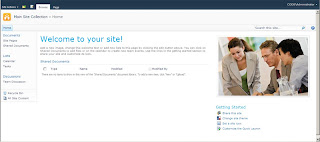
Your new site collection will look like Below figure
Installing SharePoint Designer
Download SharePoint Designer 2010(64bit)
Download SharePoint Designer 2010 (32bit)
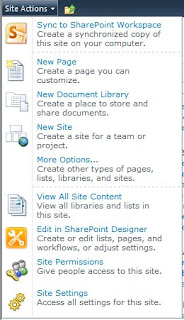
or from Site collection site actions -> edit in SharePoint Designer
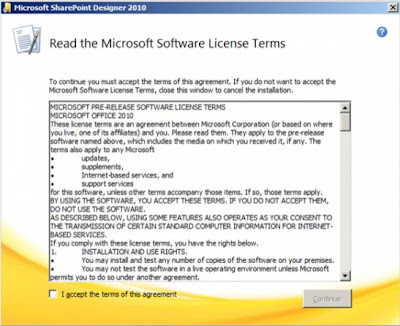
By the time you’re running the SharePoint Designer installation you will come across “read the Microsoft software license terms” enable the agree check box and continue.
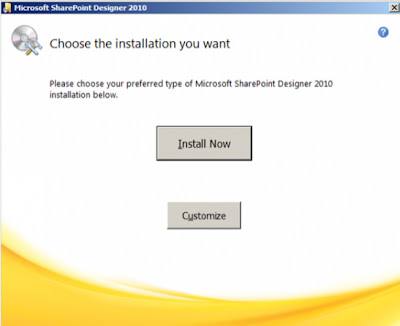
“choose the installation you want” screen click on Install Now
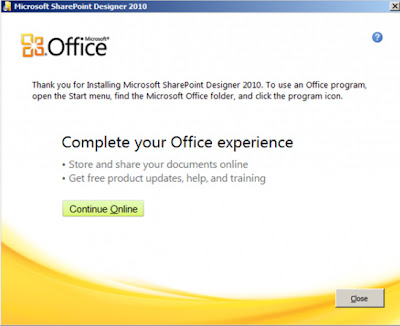
SharePoint Designer Installation completes with blow figure in this screen click close
Installing Browsers for Usability Testing
Download “FireFox” browser
Download “Google Chrome” browser
Dwonload “Apple Safari” browser
Next will be setting up a site collection for our branding activitice for that we need to make some changes in site collection -> Site Settings.
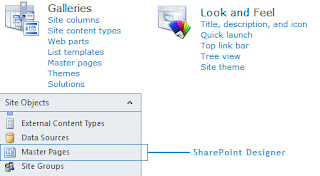
Now in SharePoint Designer and Site Settings we have only limited setting for branding under Look and Feel, Galleries and Designer. Below figure shows existing setting
For that we need to activate certain features
SharePoint Server Publishing Infrastructure
Site Actions -> Site Settings -> Site Collection Administration -> Site collection features

SharePoint Server Publishing
Site Actions -> Site Settings -> Site Actions -> Manage site features

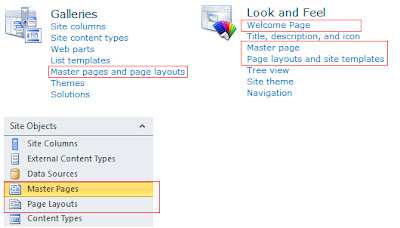
Below figure shows existing setting after features added
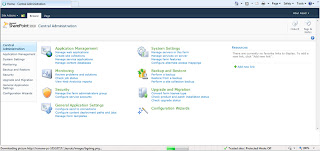
You can access the SharePoint Central Administration site from Start menu -> All Programs -> SharePoint 2010 Products -> Central Administration. Your Central Administration site will look like Below figure
Our next step will be how to make use of out-of-the-box sharepoint branding. We will meet on next post.
When you create SharePoint based Solutions, it is better to install Microsoft SharePoint Server 2010 or Microsoft SharePoint Foundation 2010 in your local computer. The post enables you to get started with an environment that is specifically suited to SharePoint Branding environment.
System RequirementsThe minimum requirements for installing SharePoint 2010 are
- 64-bit operating system running either Windows Server 2008 with SP2 or later or Window Server 2008 R2
- OS will need at least .NET 3.5 with SP1 installed as well
- SQL Server 2005 with SP2 or later or SQL Server 2008. SQL must be 64-bit also
- 80 GB for system drive (You must have sufficient space for the base installation and diagnostics such as logging, debugging, creating memory dumps, and so on)
- CPU utilization and support for RAM over 4GB but 6GB is a better starting point
The process is kicked off with the Products Preparation Tool, to install all of Required programs that are required to make SharePoint Installation run.
Prerequisite's main functions
- First configures IIS with the necessary settings
- Search for the checks listed programs and if they are not installed, or if the wrong version is found, automatically access the Microsoft Download Center, after that download and install
Click Install SharePoint Server from launch the Microsoft SharePoint Server 2010 splash screen.
Next you will be move to prompts for Product Key. You must have the product key for your version of SharePoint Server 2010 existing

After that Read your License terms and click I accept and continue.
Next you will be Splash screen prompts for install SharePoint Server will appear Click Server Standalone, will install SQL Server Express 2010 with SharePoint Server installation package.

further details about SharePoint Setup - Farm installation you can go to below link:
http://sharepoint-admin-2010.blogspot.com/2011/01/installing-and-configuring-sharepoint.html
The Standalone installation will take few minutes, Next you will see the Run Configuration Wizard screen appear enabled the check box and click close, this will start the configuration wizard automatically.

On the Welcome to SharePoint Products and Technologies page, click Next.

The wizard will now configure SharePoint 2010 - Standalone, will take few minutes. At the Configuration Successful prompt, click Finish.

The configuration wizard creates an empty site collection and opens the page where you select its site template for your first SharePoint 2010 site collection. Select the collaboration - team site and click OK.

Your new site collection will look like Below figure

Installing SharePoint Designer
Download SharePoint Designer 2010(64bit)
Download SharePoint Designer 2010 (32bit)
or from Site collection site actions -> edit in SharePoint Designer

By the time you’re running the SharePoint Designer installation you will come across “read the Microsoft software license terms” enable the agree check box and continue.

“choose the installation you want” screen click on Install Now

SharePoint Designer Installation completes with blow figure in this screen click close

Installing Browsers for Usability Testing
Download “FireFox” browser
Download “Google Chrome” browser
Dwonload “Apple Safari” browser
Next will be setting up a site collection for our branding activitice for that we need to make some changes in site collection -> Site Settings.
Now in SharePoint Designer and Site Settings we have only limited setting for branding under Look and Feel, Galleries and Designer. Below figure shows existing setting

For that we need to activate certain features
SharePoint Server Publishing Infrastructure
Site Actions -> Site Settings -> Site Collection Administration -> Site collection features

SharePoint Server Publishing
Site Actions -> Site Settings -> Site Actions -> Manage site features

Below figure shows existing setting after features added

You can access the SharePoint Central Administration site from Start menu -> All Programs -> SharePoint 2010 Products -> Central Administration. Your Central Administration site will look like Below figure

Our next step will be how to make use of out-of-the-box sharepoint branding. We will meet on next post.
